 Save
Save The first time I attempted a red velvet cake with a dark chocolate silhouette, my kitchen looked like a crime scene. I'd underestimated how stubborn dark chocolate can be when you're trying to pipe a delicate Betty Boop profile onto parchment, and my first three attempts ended as jagged, broken-hearted failures. But when that fourth silhouette finally set perfectly and I pressed it onto the crimson frosting, something magical happened—the contrast made the whole cake feel like it was winking at everyone who saw it.
My sister requested this for her birthday, and I spent two evenings practicing chocolate Betty Boop faces while binge-watching old cartoons. When she saw it, she actually gasped—then immediately asked if I could make one for her best friend's wedding shower. Now I keep a stash of printed stencils in my baking drawer because you never know when you'll need to turn a regular cake into something that makes people pull out their phones before they even pick up a fork.
Ingredients
- Cake flour: The lower protein content keeps the crumb tender and soft—don't swap for all-purpose unless you want a denser, chewier result
- Natural cocoa powder: Just enough to give the red velvet its subtle chocolate undertone without overpowering that classic velvety flavor
- Buttermilk: The acidity activates the baking soda and creates those signature tender velvet-style crumbs that practically melt in your mouth
- Red gel food coloring: Gel delivers that vivid red without thinning your batter like liquid food coloring does
- Cream cheese: Room temperature is non-negotiable here—cold cream cheese means lumpy frosting and nobody wants that disappointment
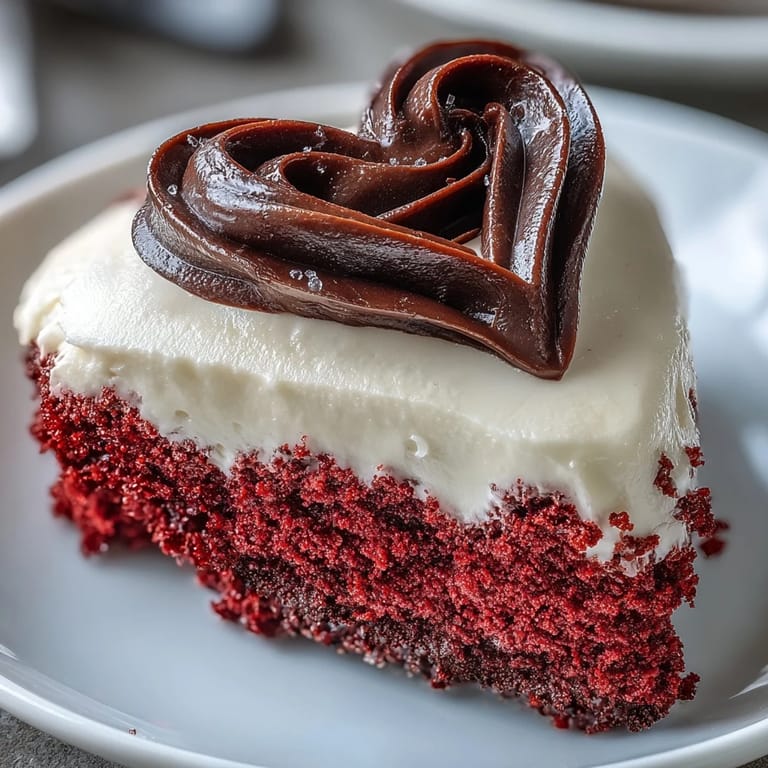
- Dark chocolate or candy melts: The darker and glossier your chocolate, the more dramatic that silhouette will look against the red frosting
Tired of Takeout? 🥡
Get 10 meals you can make faster than delivery arrives. Seriously.
One email. No spam. Unsubscribe anytime.
Instructions
- Prep your pans and warm up your kitchen:
- Preheat your oven to 350°F and grease two 9-inch heart-shaped pans like your life depends on it, then line the bottoms with parchment paper circles cut to fit.
- Whisk together your dry foundation:
- In a medium bowl, sift together the cake flour, cocoa powder, baking powder, baking soda, and salt—sifting might feel extra but it's what prevents those dreaded white flour pockets in a red cake.
- Cream butter and sugar until fluffy:
- Beat that butter for a full minute before adding sugar, then cream them together for 2–3 minutes until the mixture looks pale and feels like you're stirring a cloud.
- Add eggs one at a time:
- Drop in each egg individually, beating just until blended after each one, and don't forget to scrape down the bowl—those egg streaks need to fully disappear into the batter.
- Paint it red:
- Pour in the red gel coloring, vanilla, and vinegar, mixing until the batter turns an impossibly vibrant red that almost stains your spoon.
- Alternate dry and wet ingredients:
- With the mixer on low, add dry ingredients and buttermilk in alternating batches, ending with the final third of dry mixture, and stop mixing the second you see the last flour streak disappear.
- The vinegar trick:
- Mix that teaspoon of vinegar with the baking soda, watch it foam up like a tiny science experiment, then gently fold it into the batter—this is what creates those tender velvet-like crumbs.
- Bake until perfectly set:
- Divide batter between your prepared pans, smooth the tops, and bake for 25–30 minutes until a toothpick comes out clean and the cakes spring back when lightly touched.
- Cool completely before frosting:
- Let the cakes rest in their pans for 10 minutes, then turn them out onto wire racks to cool completely—warm cake equals melty frosting disaster.
- Make the frosting dreamy:
- Beat room temperature cream cheese and butter until silky smooth, then gradually incorporate powdered sugar, vanilla, and a pinch of salt until it's thick enough to hold its shape but still spreadable.
- Build and crumb coat:
- Level any domed tops, stack your layers with frosting between them, then apply a thin crumb coat over everything and chill for 10 minutes—this locks in those loose crumbs so your final layer stays pristine.
- Frost like a pro:
- Add your final layer of frosting, using an offset spatula to create swoopy swirls or glassy smooth sides depending on your mood.
- Create the chocolate silhouette:
- Place your Betty Boop stencil under parchment paper, trace the outline with melted dark chocolate using a piping bag or small brush, and let it set completely at room temperature or in the fridge.
- The grand finale:
- Carefully peel that chocolate silhouette from the parchment and press it gently onto the center of your frosted cake, watching everyone's eyes widen as the dark chocolate pops against the bright red.
 Save
Save Last Valentine's Day, I made six of these cakes for a Galentine's brunch, and by the end of the party, three different people had asked for the silhouette stencil. There's something about that classic Betty Boop profile that makes people smile before they even take a bite—like the cake is in on a joke with you.
Getting That Perfect Red
After years of red velvet experimentation, I've learned that gel food coloring is absolutely worth the extra few dollars. Liquid coloring thins your batter and can give you a weird aftertaste, but a tiny squeeze of red gel delivers that impossible velvety crimson without affecting texture or flavor whatsoever.
Making Chocolate Silhouettes
The secret to a perfect chocolate Betty Boop is patience—let the chocolate set completely at room temperature instead of rushing it into the fridge. Cold chocolate can crack or develop condensation when it hits room temperature frosting, and nothing ruins your day like a weeping silhouette.
Storage and Serving Tips
This cake actually tastes better after chilling overnight in the refrigerator—the flavors meld together and that cream cheese frosting firms up into the most luxurious texture. Just let it sit at room temperature for about 30 minutes before serving so the frosting softens enough to cut cleanly.
- Warm your knife under hot water and wipe it dry between slices for the cleanest cuts through that chocolate silhouette
- If you're making this ahead, keep the chocolate silhouette separate and add it right before serving so it stays perfectly crisp
- Any leftover cake keeps for up to four days in the refrigerator, though I've never personally seen it last past day two
 Save
Save Every time I make this cake, I'm reminded that the most impressive desserts often come from the simplest ideas—just red velvet, cream cheese frosting, and one perfectly placed chocolate silhouette that makes people feel like they're eating something truly special.
Recipe Guide
- → How do I ensure my cake is vibrantly red?
For the most intense red hue without altering batter consistency, use gel-based food coloring. Adding it with the wet ingredients helps distribute the color evenly throughout the batter.
- → Can I prepare the chocolate silhouette in advance?
Yes, the dark chocolate Betty Boop silhouette can be made a day ahead. Once fully set, carefully peel it from the parchment paper and store it in an airtight container at room temperature until ready to use.
- → What's the key to a perfectly smooth cream cheese frosting?
Ensure your cream cheese and butter are both at room temperature. Beat them thoroughly until smooth and lump-free before gradually incorporating sifted powdered sugar and vanilla extract.
- → How can I achieve clean slices when serving?
For neat and tidy slices, chill the cake in the refrigerator for at least 30 minutes before cutting. Use a warm, clean serrated knife, wiping it clean between each slice.
- → Can I use regular round cake pans instead of heart-shaped ones?
While heart pans create the iconic shape, you can use two 9-inch round cake pans. After baking and cooling, you can trim and assemble the round layers to form a heart shape before frosting.
- → Why is white vinegar included in the cake ingredients?
The white vinegar works with the baking soda to create a chemical reaction, producing tiny bubbles that contribute to a light, airy, and incredibly soft crumb, which is characteristic of many red velvet-style bakes.