 Save
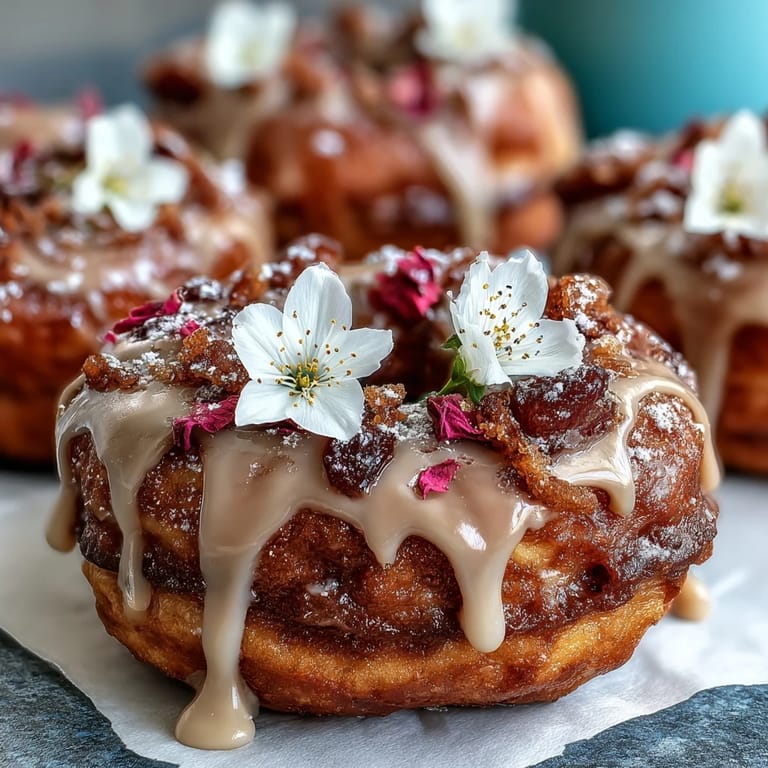
Save My friend texted me a photo of a donut tower she'd seen at a garden party, and I couldn't stop thinking about it. There was something so joyful about stacking mini donuts into this edible structure, topped with flowers that made it look like a tiny celebration waiting to happen. When a baby shower invitation arrived weeks later, I knew exactly what I wanted to bring. The beauty of this tower is that it's almost impossible to mess up—you're just arranging donuts in a cone, tucking flowers between them, and suddenly you have a showstopping centerpiece.
I showed up to that baby shower with the tower in a big bakery box, and when I unwrapped it on the dessert table, people actually gasped. An older woman came over and said it reminded her of hats her grandmother used to wear in the 1950s, and suddenly everyone was sharing memories while reaching for donuts. That's when I realized this tower isn't really about the donuts at all—it's about creating a moment where people stop, smile, and feel like something thoughtful just happened.
Ingredients
- Mini Donuts (36–40): The foundation of everything—grab plain, glazed, or a mix of flavors and colors from the bakery section rather than the shelf, because fresh tastes noticeably better when people are eating them off a tower.
- Powdered Sugar (1 cup): This creates a light glaze that clings to the donuts without being heavy; sift it first so your mixture stays silky.
- Milk or Water (2–3 tbsp): Start with two tablespoons and add more slowly until you reach that perfect consistency—not runny, not stiff.
- Vanilla Extract (1/2 tsp, optional): A tiny splash transforms basic glaze into something that smells like actual dessert.
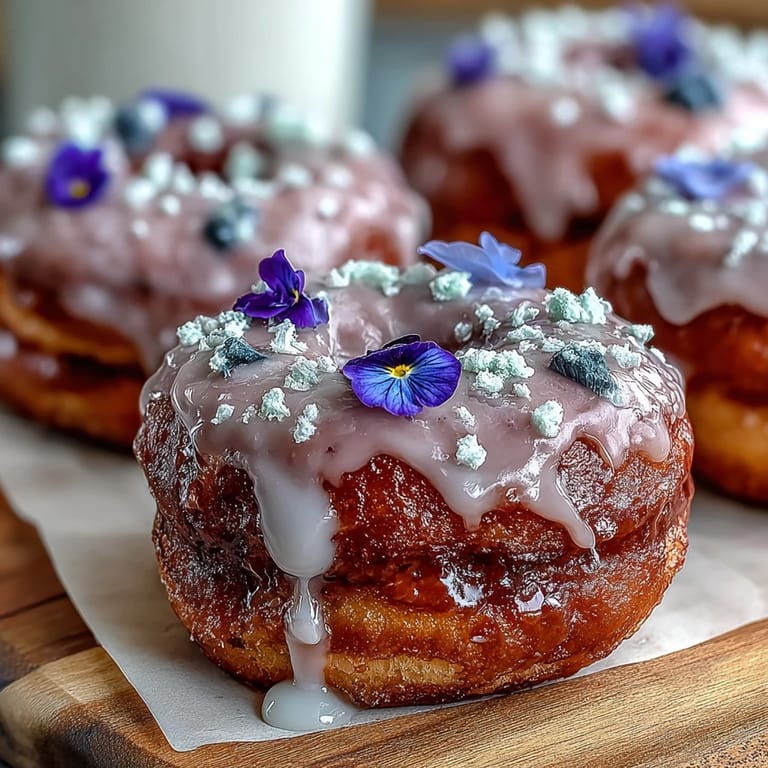
- Food Coloring (pastel shades): Pastels feel softer and more sophisticated than bright colors, and they photograph beautifully.
- Sprinkles (1/4 cup): Rainbow or pastel varieties add whimsy without overwhelming the delicate flower aesthetic.
- Edible Flowers (1 cup): Violets, pansies, nasturtiums, and marigolds are reliable choices—always verify they're labeled edible and pesticide-free, because this detail actually matters.
- Fresh Mint Leaves (optional): These cool green pockets of color break up the sweetness and add freshness between all those donuts.
- Foam Cone (10–12 inches): This is your building skeleton; craft stores carry them, and they're sturdy enough to hold the weight without tipping.
- Toothpicks or Wooden Skewers: These anchor the donuts in place—I prefer skewers because they're sturdier, but toothpicks work if you're gentle.
Tired of Takeout? 🥡
Get 10 meals you can make faster than delivery arrives. Seriously.
One email. No spam. Unsubscribe anytime.
Instructions
- Make Your Glaze (if you want it):
- Whisk powdered sugar with milk until you have something that coats the back of a spoon without dripping off immediately. Add vanilla, a whisper of food coloring for that pastel tint, and stir until it feels smooth and looks inviting.
- Dip and Decorate:
- Hold each donut by the side and dip the top into your glaze, then immediately shower it with sprinkles while the glaze is still sticky. You'll feel when the coating catches and sets, which takes about fifteen minutes—patience here prevents a sticky tower later.
- Prepare Your Base:
- Place the foam cone on your serving platter, making sure it's centered and won't roll. If you're using a tiered stand instead, arrange it now while you have space to work.
- Build From Bottom to Top:
- Start at the widest part of the cone and push toothpicks or skewers through the donuts into the foam, working in overlapping circles as you move upward. The donuts will start to look like roof shingles, each one slightly overlapping the one below, which is exactly what you want.
- Tuck In Your Flowers:
- Once the donuts form your base structure, gently nestle edible flowers and mint leaves into the spaces between them. Step back and look at it—if you see foam peeking through, add more flowers until it looks like a garden explosion caught mid-bloom.
- Fill the Gaps:
- Any bare spots that remain can be softened with extra sprinkles or small flowers; this is where you can play and make it feel intentional rather than sparse.
- Chill and Serve:
- Cover loosely with plastic wrap and refrigerate up to four hours, or serve immediately if you're at the location. The glaze sets firm in the cold, which makes the whole structure feel more solid when guests grab their donuts.
 Save
Save After the shower ended, the mom-to-be told me she'd saved the tower for another two hours because guests kept coming back to look at it, take photos, and tell her how much thought went into the presentation. That's when I understood that sometimes the smallest effort—just buying donuts and adding flowers—can make someone feel completely celebrated and seen.
Choosing Your Donuts Wisely
The donuts you choose set the entire mood. Plain glazed donuts are classic and let the flowers shine, but I've also tried ones with maple, lemon, or honey glazes, and they add unexpected flavor layers when someone bites in. If you're feeding a group with varied preferences, grab three or four different varieties and arrange them so each section of the tower has its own personality. The baker at your local shop might even glaze them fresh if you ask nicely.
The Flower Selection Secret
Pansies are forgiving because they're sturdy and stay fresh for hours without wilting, while violets add an almost delicate, fairy-tale quality. Nasturtiums bring a subtle peppery look if you want something unexpected. I learned to buy flowers the morning of your event or the night before, keeping them in a cool place in a barely damp paper towel—this keeps them perky without making them soggy. The moment you tuck them into the tower, they come alive against the sweetness of the donuts.
Timing and Storage That Actually Works
Build this tower no more than four hours before serving because the glaze softens slightly at room temperature, and you want that structural integrity when guests start pulling donuts. If you're transporting it, place it in a sturdy bakery box on a flat car seat rather than trying to hand-carry it—I've seen towers go sideways on someone's lap, and it's heartbreaking. The refrigerator is your friend here; cold donuts hold their shape better and feel more substantial when eaten.
- Assemble the tower in the location where you'll serve it if possible, because moving it risks toppling.
- Keep edible flowers separate until the last moment, then tuck them in just before guests arrive so they look dewy and fresh.
- If a donut falls off during serving, just tuck it back in or hand it to someone—the tower is meant to be eaten, not preserved.
 Save
Save This tower has taught me that sometimes the most memorable desserts aren't complicated recipes but rather thoughtful arrangements of simple things. Bring this to your next celebration and watch how quickly it becomes the thing people remember most.
Recipe Guide
- → What types of donuts work best for the tower?
Mini plain, glazed, or assorted flavored donuts work well and provide a playful variety in appearance and taste.
- → How do I attach the donuts to create stable tiers?
Use toothpicks or wooden skewers to secure donuts to a foam cone or arrange on a tiered stand for stability.
- → Are all edible flowers safe for this use?
Only use pesticide-free, edible flowers such as violets, pansies, nasturtiums, and marigolds to ensure safety.
- → Can I prepare the tower ahead of time?
Prepare and assemble the tower up to 4 hours in advance, covering loosely with plastic wrap and refrigerating until serving.
- → How can I customize the glaze decoration?
Add food coloring for pastel shades and top with sprinkles to complement the floral accents and overall theme.